Mechanical Design and Machine design
Introduction
These are our assignements •design a machine that includes mechanism+actuation+automation• build the mechanical parts and operate it manually
• document the group project and your individual contribution
• actuate and automate your machine
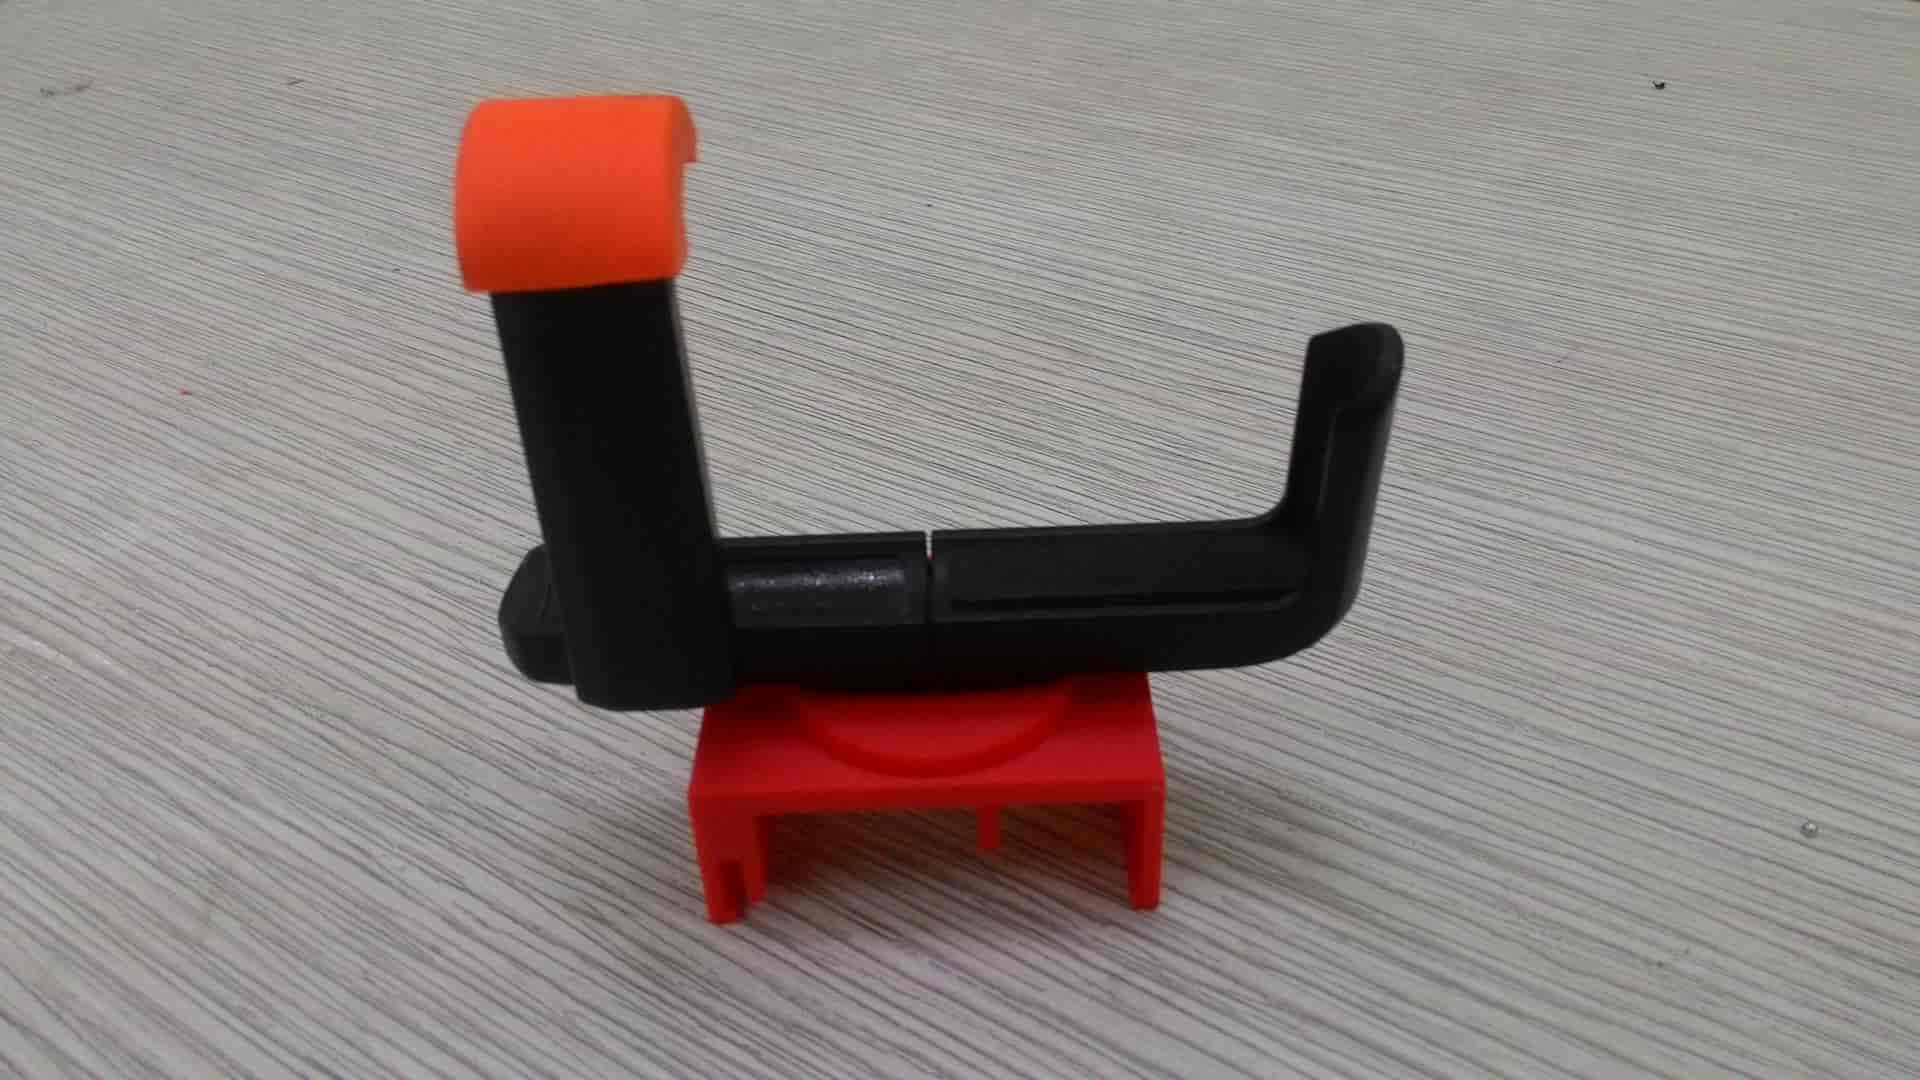
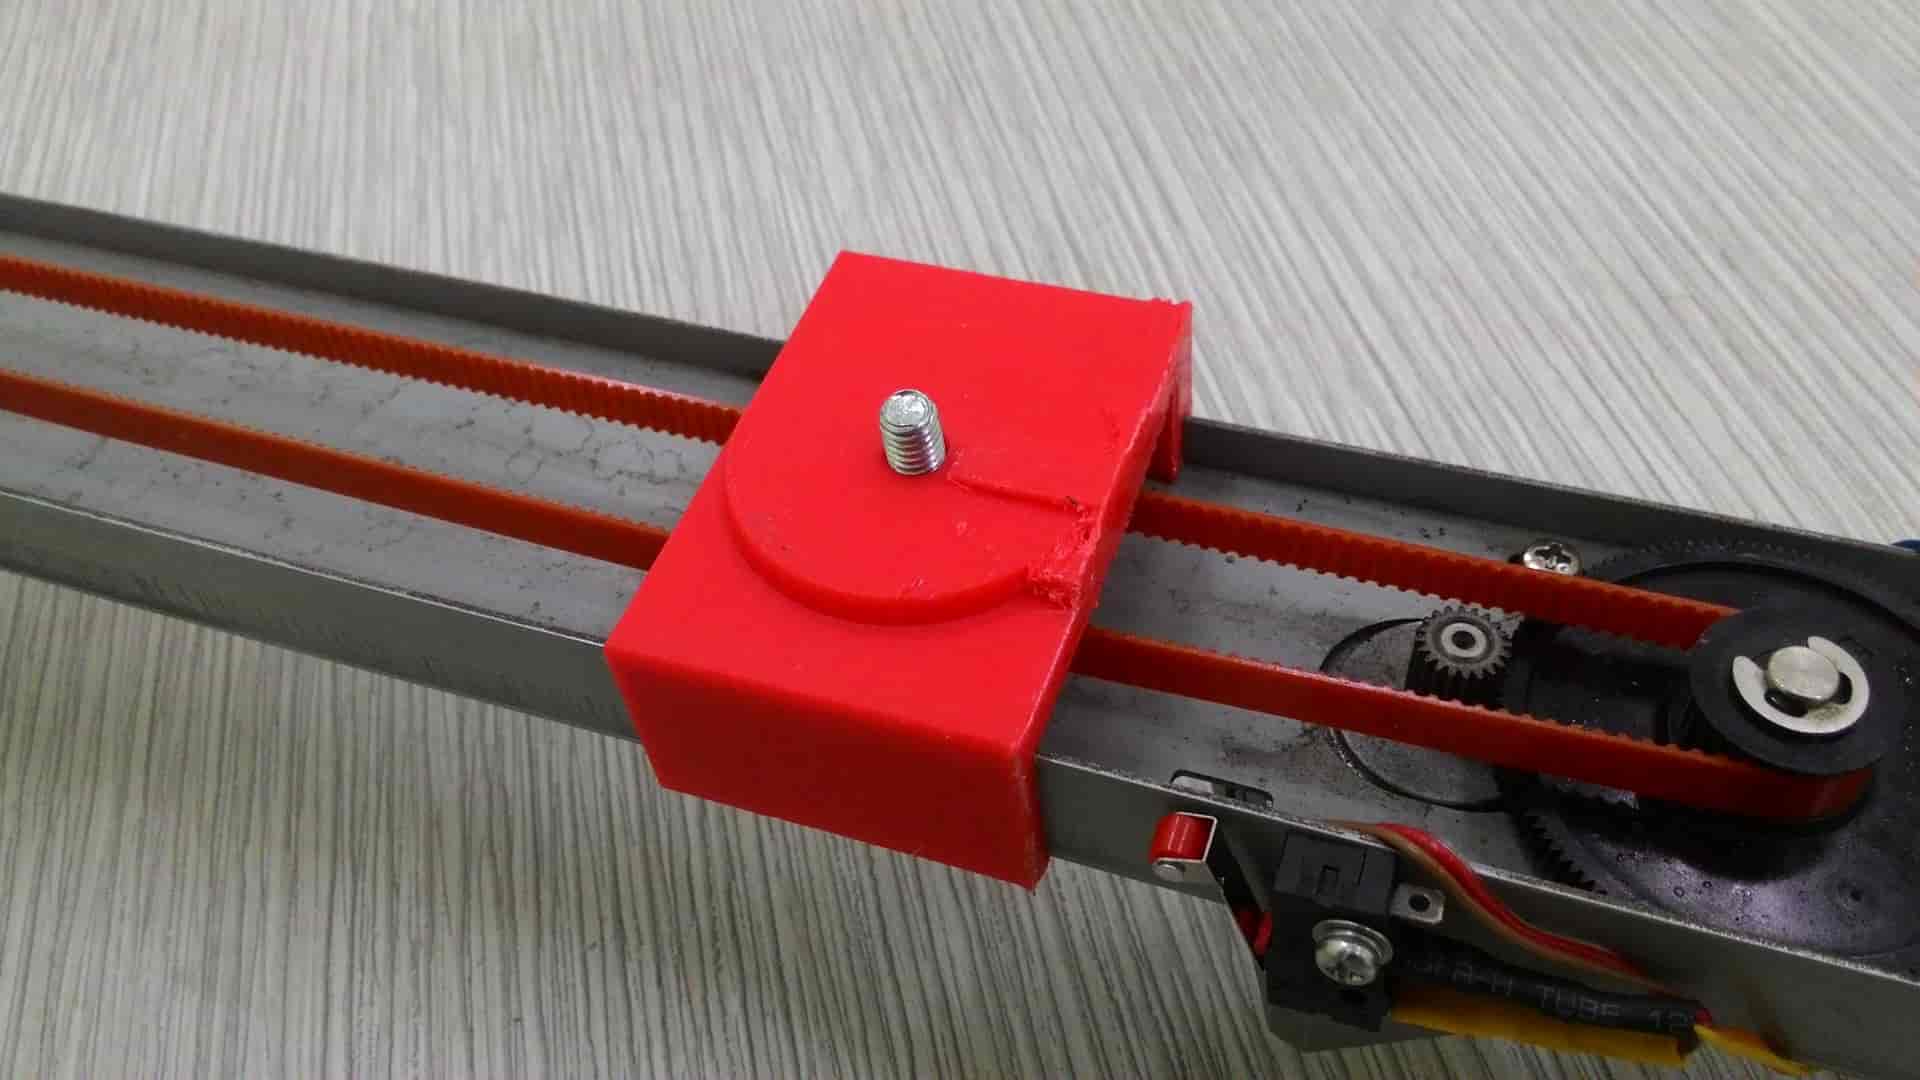
• document the group project and your individual contribution For Mechanical Design and Machine Design weeks, we decided to make a camera control machine. With this machine, we can adjust focus(for macro cameras) of the camera, and also shot videos in motion with other moving objects. The main problem that our macro camera is have manual focus mechanism. With this mechanism is very hard to get the right focus. We what to solve this problem by making automated camera control machine. Before starting this group project, first of all, we need to make a plane. We make tasks for each of as and divided them. During this assignement I should to design and print all parts for our machine using computer-aided design and 3D printing techniques.
Our team and roles
• Michael Aramyan is responsible for design and cut parts for the machine by using computer-controlled machining and computer-aided design techniques.
• Babken Chugaszyan is responsible for design, manufacture and program the electronics part of the project by using electronics design, production, and embedded programming techniques.
• I (Mariam Nahapetyan) am responsible for design and print all parts for the machine using computer-aided design and 3D printing techniques. And I have to do a little bit project managment and precurement.
We need project management component for the development our project on time and define roles. Usually I am using Bitrix 24 as a tool for managing and tracking the processes in the lab.
Introduction to 3D modeling
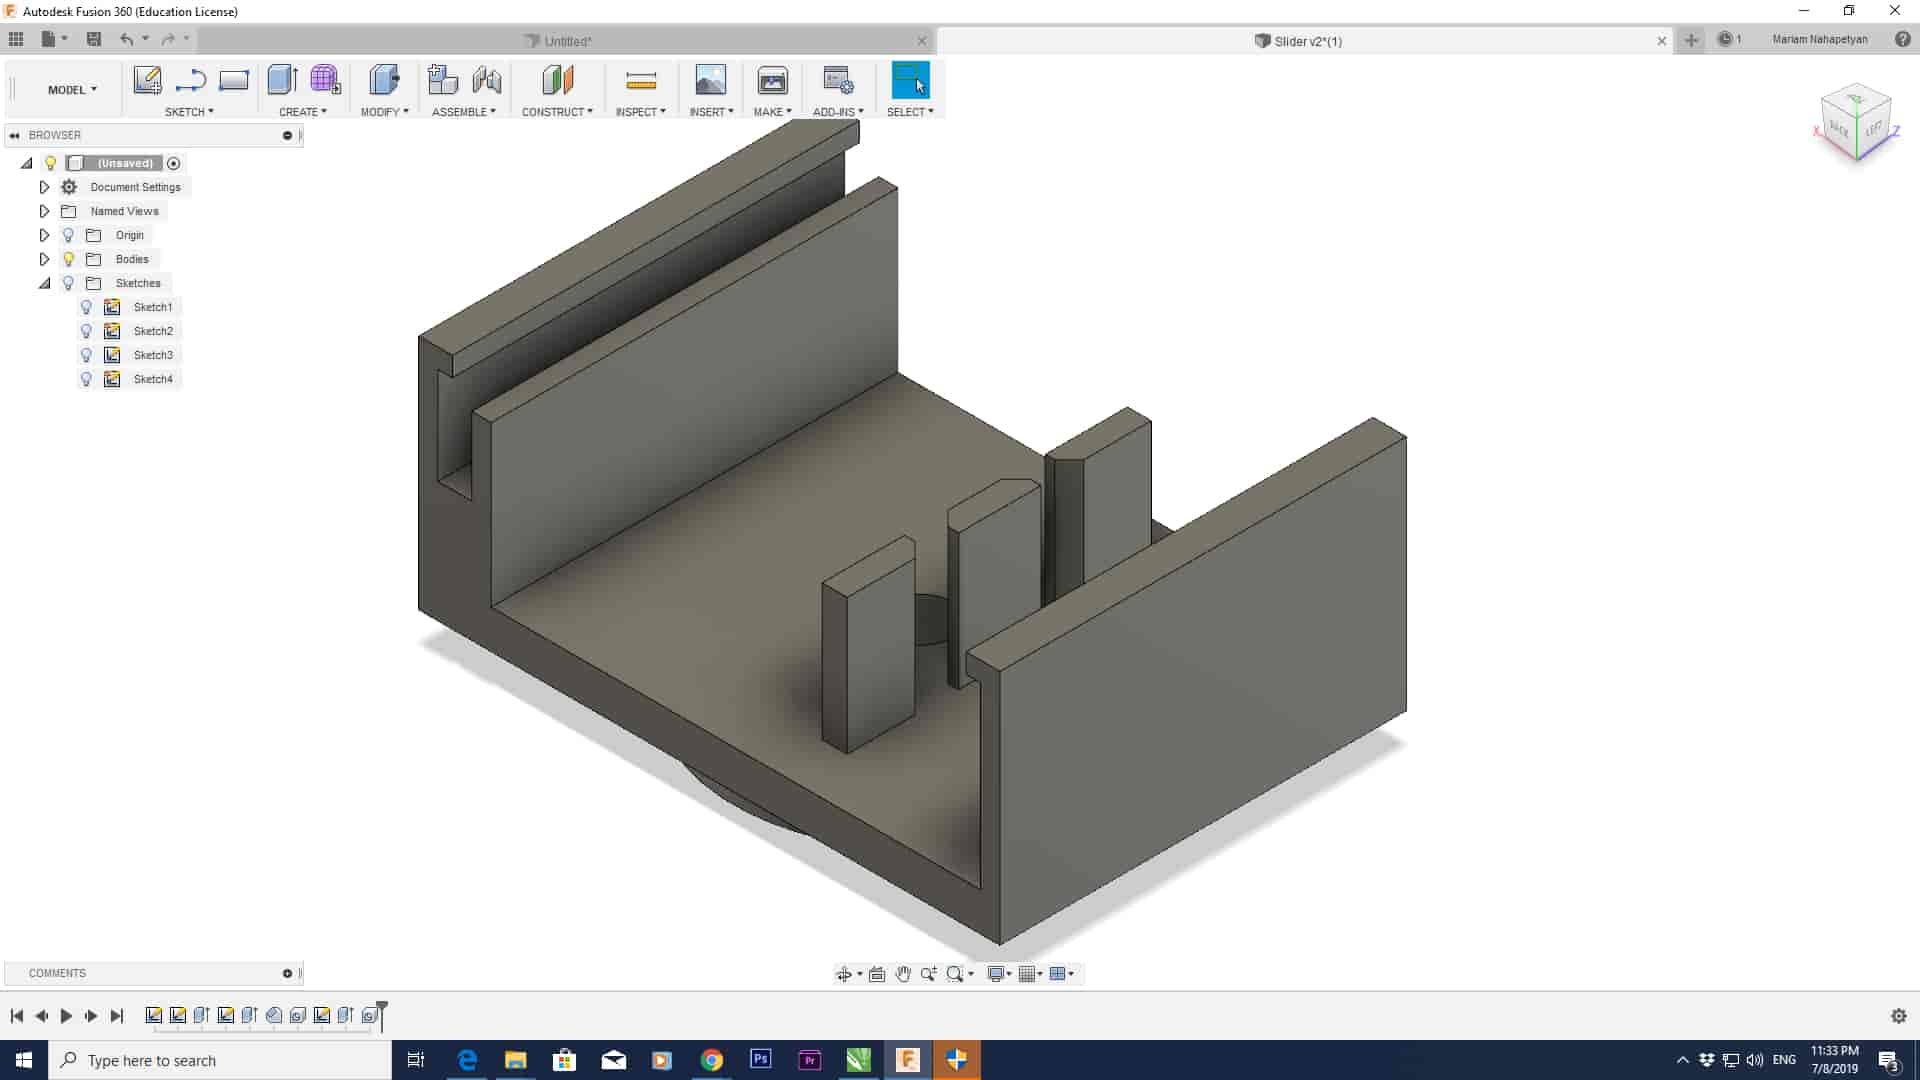
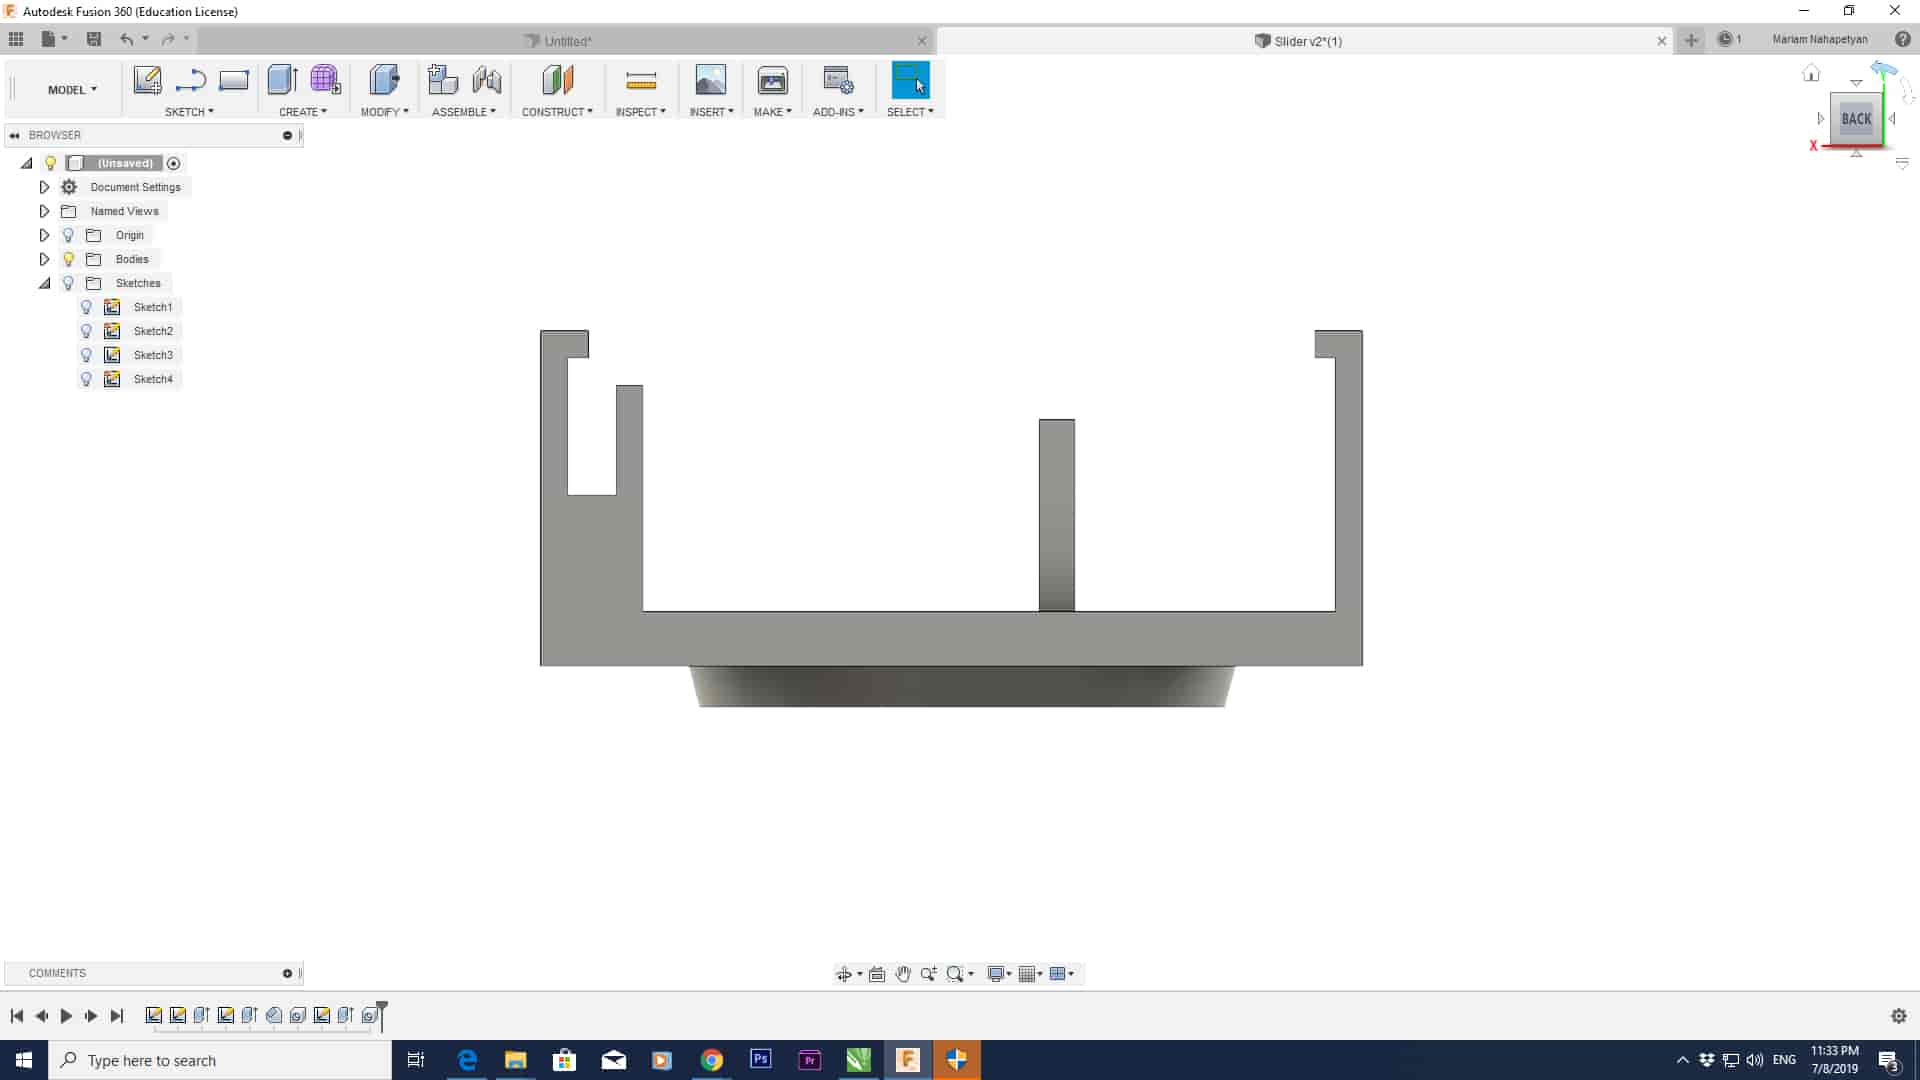
As a 3D model, I should to design a holder for a camera that fits on the rail. The modeling of this part is very challenging because it has a complex structure. But by using Fusion 360 is very easy to draw and get the right design. Fusion 360 is an integrated CAD, CAM, and CAE software. It simplifies your entire workflow with one unified platform. Also, Fusion 360 has• 3D design and modeling
• Simulation
• Generative design
• Documentation
• Collaboration
• Manufacturing
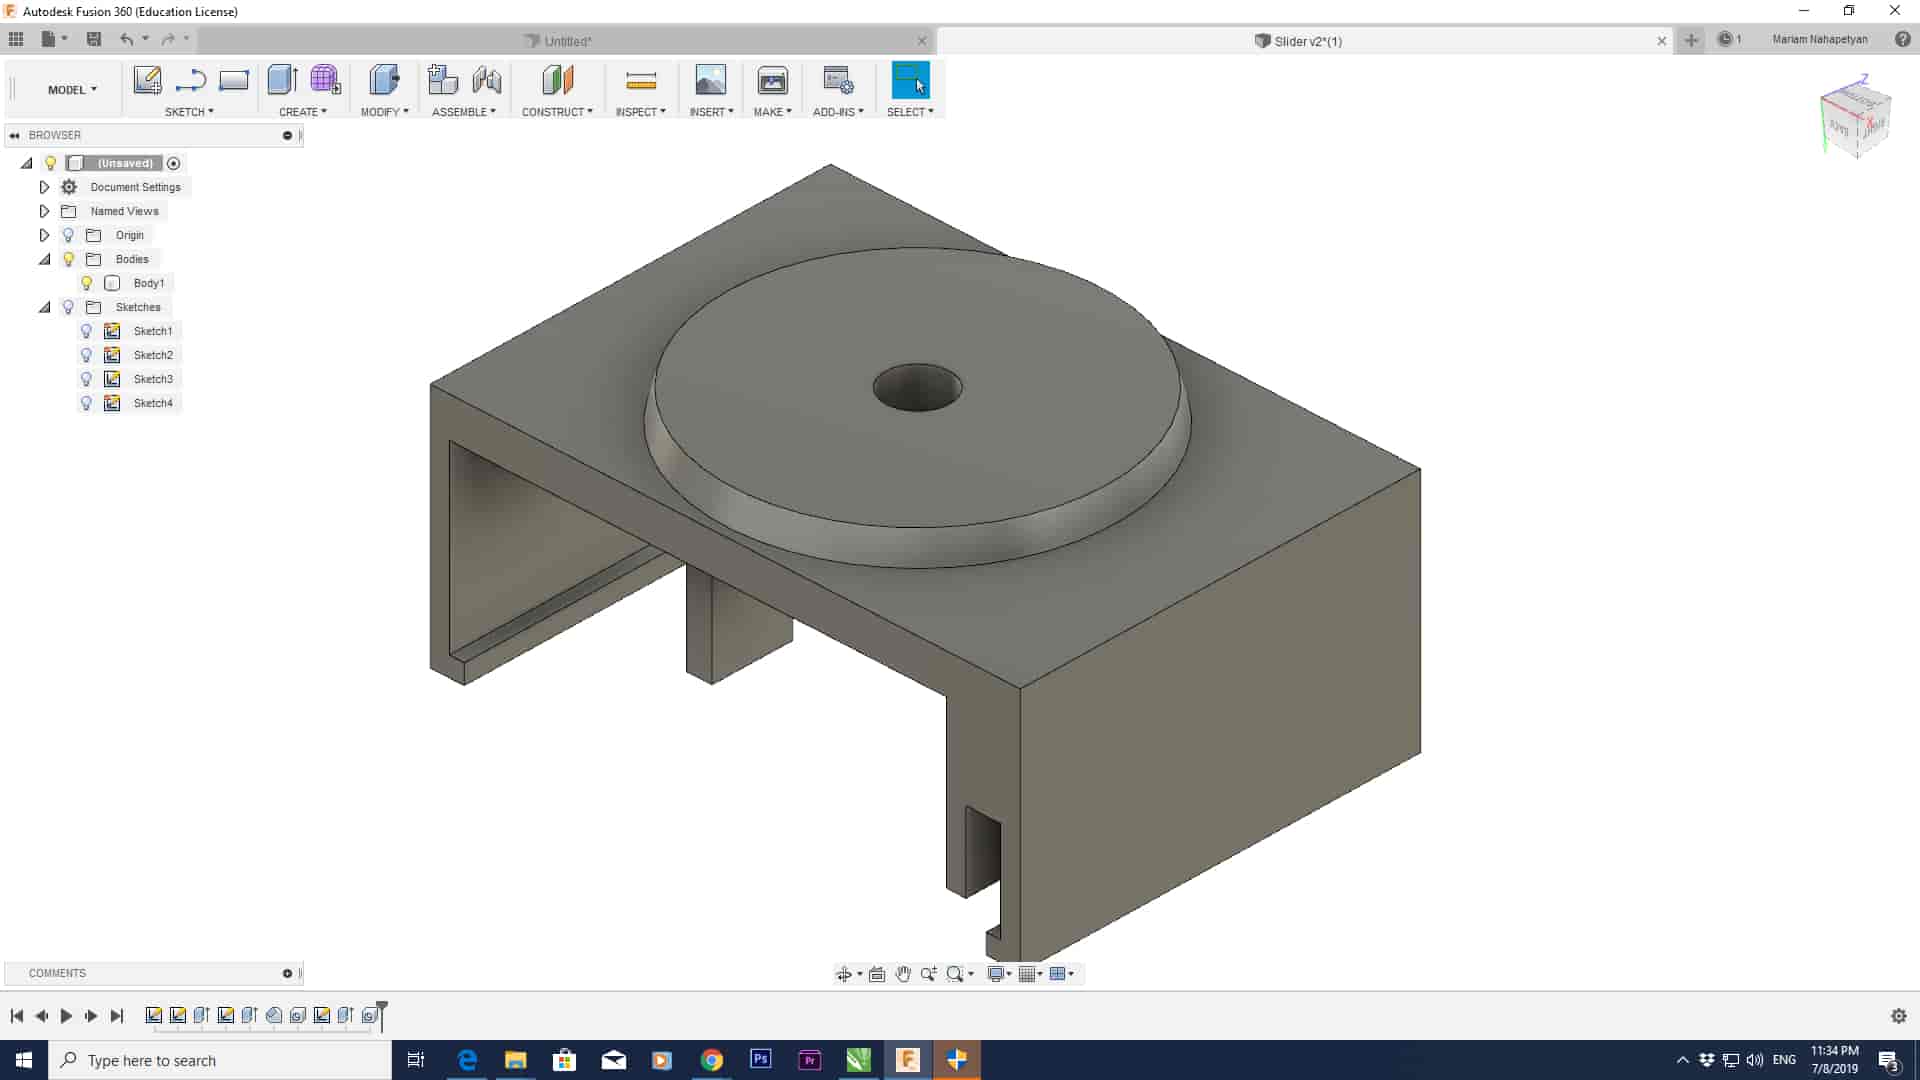
The main process in 3D modeling is to draw 2D sketch and turn the 2D sketch into a 3D object by expanding it from the plane. Also by using the diferent tool you shape or modify your object 3D model. Before starting modeling I need to measurements from the rail. The main tools that have been used for modeling are
• Create Sketch(in SKETCH)
• Rectangle(in SKETCH)
• Line(in SKETCH)
• Fillet(in SKETCH)-Place an arc of a specified radius at the intersection of two lines or arcs. Select the vertex or the two lines or arcs. Spacify a radius for the fillet.
• Circle(in SKETCH)-Center Diameter Circle C
• Extrude
• Fillet
• Charmfer
• Mesure
3D printing
For 3D printing, I used Ultimaker Extended 2 Plus, as I was out of Dilijan Fab Lab and used another one. This 3D printer delivers robust single extrusion 3D printing. It is affordable, reliable, and user-friendly, the Ultimaker 2 Extended+ deliver consistent results – suitable for rapid prototyping and concept models. They feature swappable nozzles, a heated glass build plate, and an open filament system.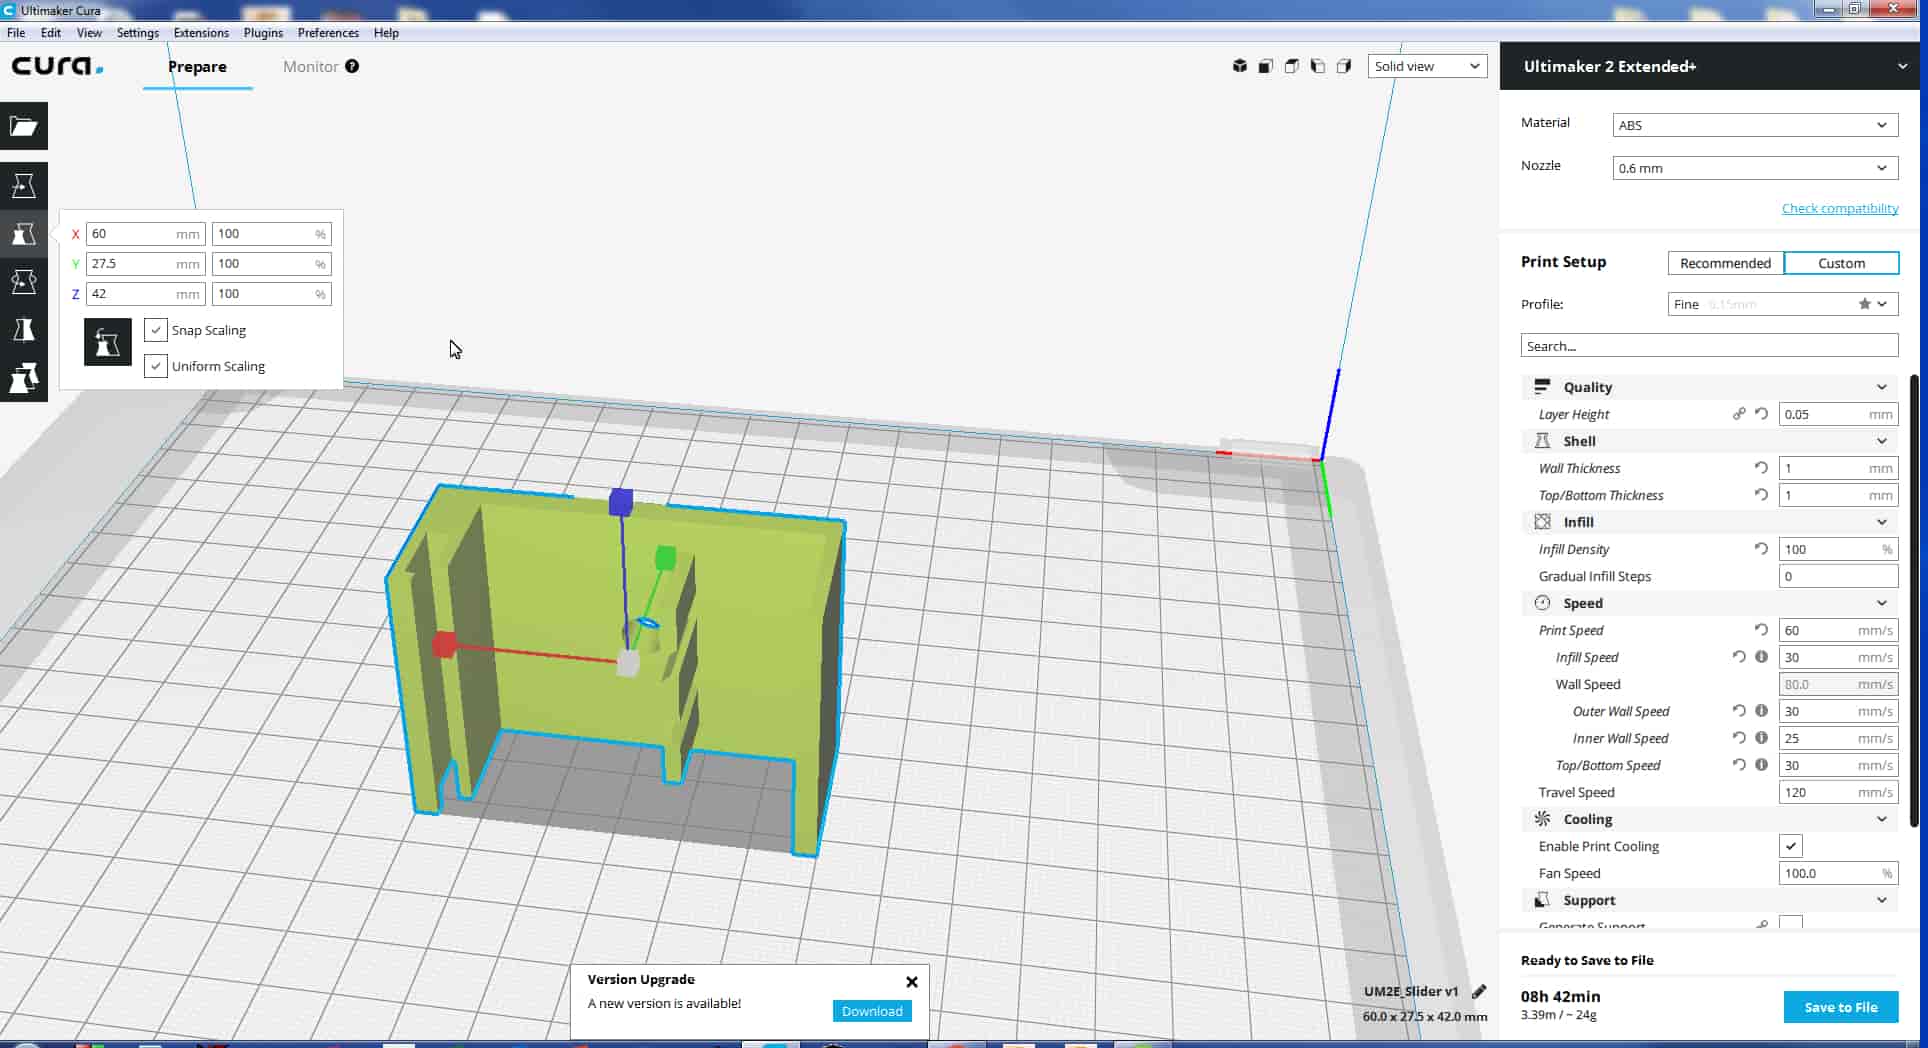
First, I export our 3D model in .stl file format an imported it in "Cura" softer which is support Ultimaker printers. I have adjusted the position of the model to apply for less support. I have used custom settings
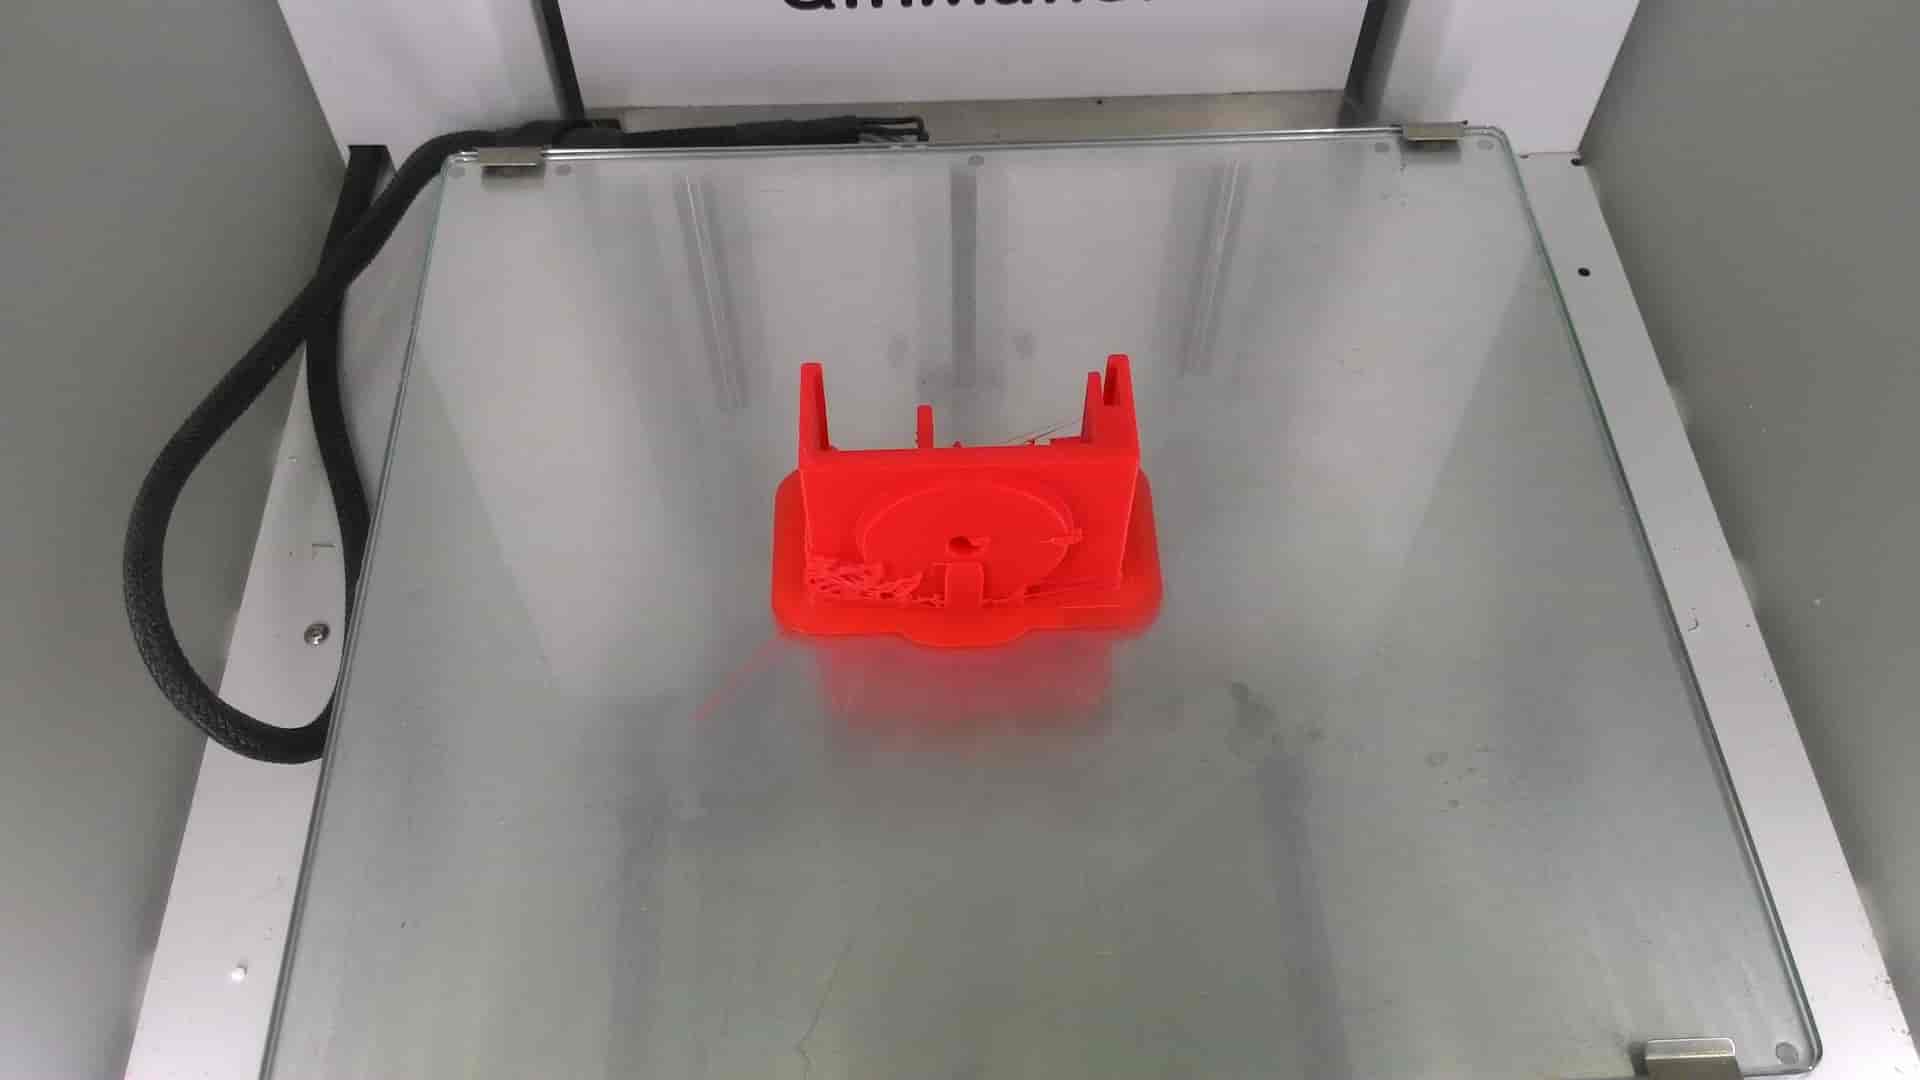
• Material- 2.8mm Red ABS
• Profile-Fine 0.15mm
• Layer Height-0.2mm
• Wall Thickness-1mm
• Top/Bottom Thickness-1mm
• Infill Density-30%
• Gradual Infill Steps-0
• Print Speed- 60mm/s
• Infill Speed -30mm/s
• Wall Speed-80.0mm/s
• Outer Wall Speed-30mm/s
• Inner Wall Speed-25mm/s
• Top/Bottom Speed-30mm/s
• Travel Speed-120mm/s
• Colling -100%
• Support- Raft (zigzag)
Ultimaker 2 Extended+ has: 228.6 x 226.06 x 304.8mm Build Volume Easily switch between 0.25, 0.40, 0.60 and 0.80 mm nozzles It prints ABS, PLA, HIPS, PET, ColorFabb XT, ColorFabb XT-Carbon Fibre, Woodfill, Bronzefill, Copperfill, Brassfill and flexible materials such as PolyFlex and Ninjaflex Requires 2.85mm filament.
Conclusion
We warked together had some organizational problems but we solved them. As I had to use another 3D printer, I had to learn how it works and printed the parts 2 times.Here are the videos of our machine
• Video N1
• Video N2
Here you can download the files of the whole project
• Programme
• MAchine legse
• Make file
• Slider
• PCB PNG
• KiCad